Sunday, December 30, 2012

5 Decks, 2 Brigadiers Done

Over the Holidays I managed to play 5 "decks" of the "Bellevue Hills" battle . . . although two of the decks were super-short and none of them very long.  Nevertheless, a great deal happened near the southern bridge . . . including the loss of another brigadier.

Southern Bridge (from ESE) at end of Deck 12
Deck 9 started well for Stagonia with their Jillette Knights charging and destroying Alpia's Zuff Pike & Shot regiment and carrying on into the Utti regiment (which was caught in Open Order).

Subsequently however a superb shot (six hits on 6 dice) by the Xelt regiment  wiped out the Stagonian Artillery Guard.

But the Goyette P&S unit in the north countered by wiping out the Yellow Squadron of the Asti Spumonti Cavalry.  Again Alpia countered with their Izzo Pike & Shot causing a casualty to the Jillete Knights and Xelt routing the Stagonian's blue gun crew.

Bridge from South
By the way, the amber dice on units (as seen at left) signifies "Shaken" status; and the black disks the number of "Casualties".

In Deck 9, Alpia's Blue Battery, commanded by Captain Ariete, was charged and destoyed by the Brown Squadron of Stagonia's Pincemail Cavalry.  Unfortunately the Red Squadron failed to rout Alpia's Xelt regiment when they rolled miserable dice, ending up locked in melee.

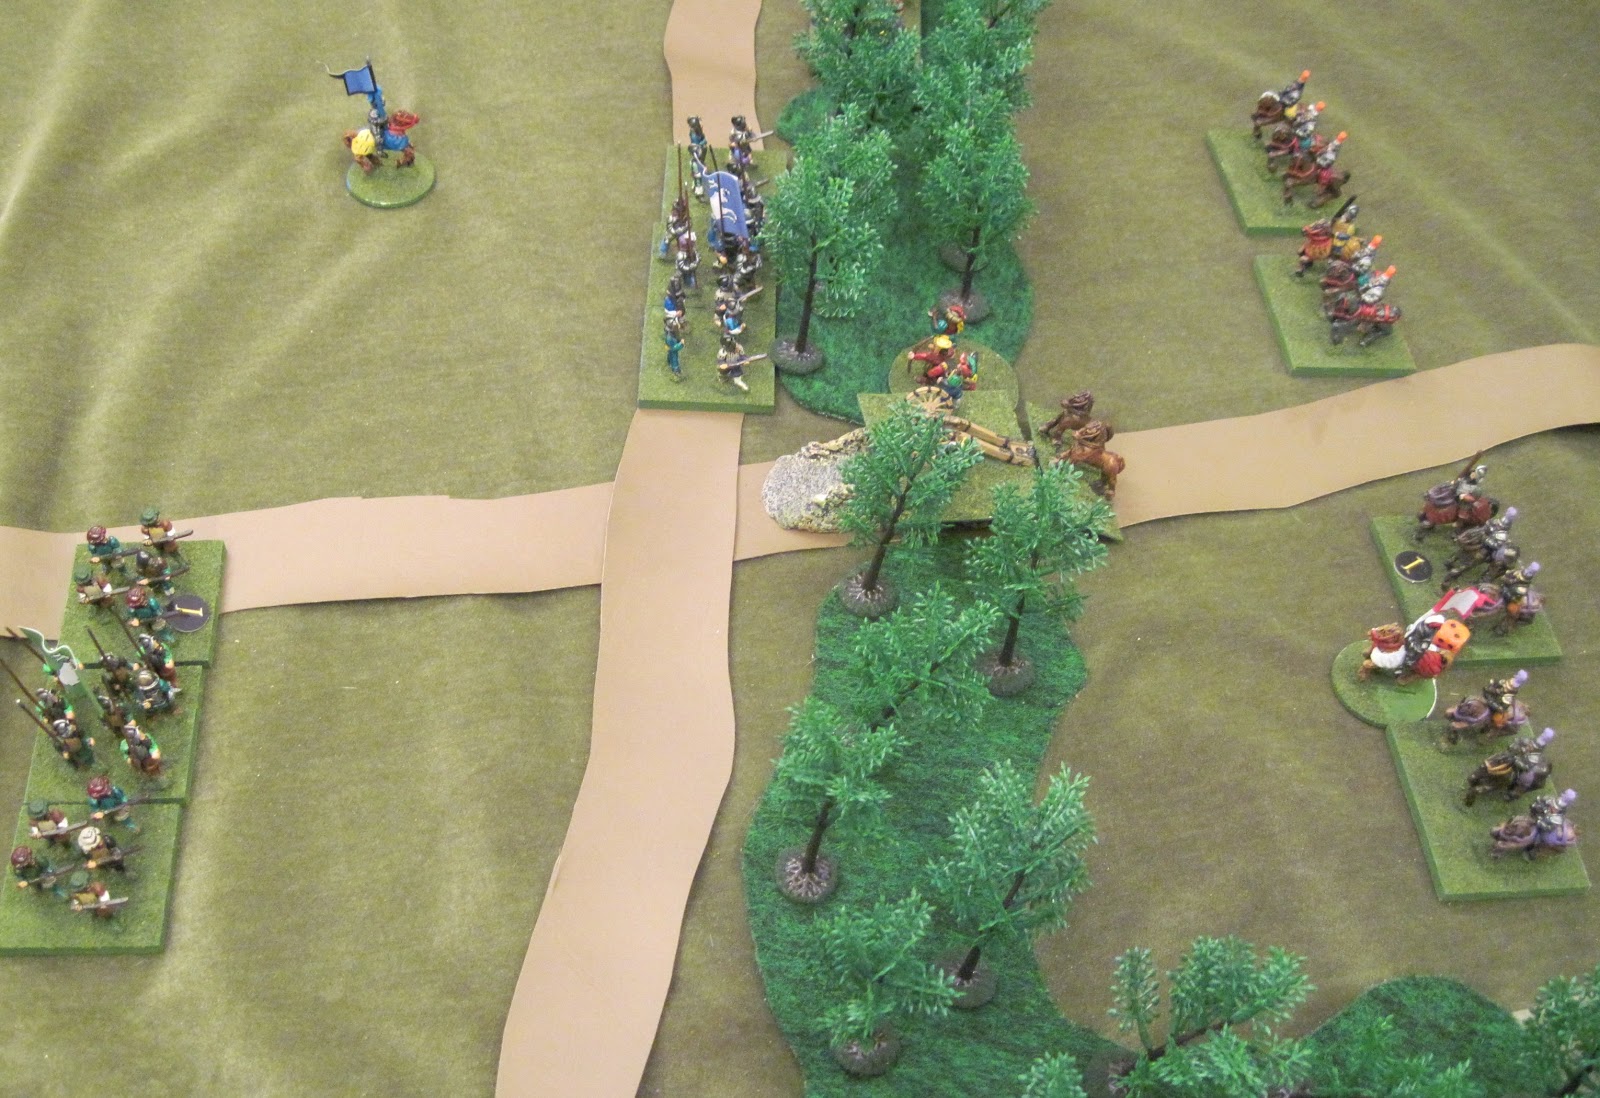
From the West -- End of Deck 12
While Deck 9 was short, Decks10 and 11 were super-short with a total of only three cards turning before the "End of Turn" showed up.

Deck 12 was much more eventful.  Alpia's Izzo unleashed a nasty volley that dissolved the Blue Squadron of the Jillette Knights and killed Brigadier Marcel Bizot in the process.  Another volley from them halted the charge of the Jillette's Purple Squadron.

Northern Bridge (looking South)
 Meanwhile the Pincemail Cavalry's Red Squadron pushed Xelt back, shaking it with a casualty as well.

Alpia's Utti countered by causing a casualty to Stagonia's Brown Squadron of the Pincemail Cavalry, shaking it.

Finally the turn ended with the Jillette's Purple Knights charging the Izzo Pike & Shot.  Unfortunately although they had a strong advantage, they rolled poorly, while Xelt rolled very well resulting in the destruction of the knights, opening up the center of the woodline.

Current status of each side's forces:

ALPIA

General Geovanni Rossi:
  • Lanzia Spezatta -- orders have finally arrived (Fresh)
Brigadier Paulo Lombardi -- joined Cianti's Lavender Cavalry
  • Asti Spumonti Cavalry -- Orange (fresh);  Yellow Squadron gone
  • Cianti Cavalry -- Lavender shaken, 1 casualtyBlue Squadron gone 
Brigadier Luigi Franscioni:
  • Utti Pike & Shot == open order, fresh
  • Izzo Pike & Shot ==open order, 1 casualty
  • Zuff Pike & Shot == gone
  • Qeel Pike & Shot == line, fresh
  • Picanti Swordsmen -- line, shaken, 1 casualty
Brigadier Sebastiano Olivi:
  • Xelt Pike & Shot == shaken, 1 casualty
  • Yarp Pike & Shot == rallied into line, 1 casualty
  • Telli Crossbows --gone
Artillery Batteries:
  • Capt. Corelli's Battery -- in North, fresh
  • Capt. Ariete's Battery -- in South, gone

STAGONIA

General Maxime Murdeau

Brigadier Louis Petit:
  • La Capelle Pike & Shot -- in West, moving south to center, fresh
  • Goyette Pike & Shot -- on road, fresh
  • Forquest Pike & Shot --on road, 1 casualry
Brigadier Marcel Bizot -- dead:
  • Jillette Knights -- gone
  • Pincemail Cavalry -- in far South; Brown shaken, 1 casualty; Red 1 casualty
Brigadier Eugene Delage (dead):
  • Hamoncourt Pike & Shot -- routing toward Bellevue Hills, 2 casualties
  • Ardant Pike & Shot -- gone
  • Lau Crossbows --  gone
Artillery Batteries:
  • Blue Artillery  --  gone
  • Artillery Guards  --  gone
  • Red Artillery  --  gone

So now it looks like the "treeline defense" won't hold . . . so what will Stagonia do?  Look for the answer in the coming year.  And I wish you all a most wonderful and happy New Year.


-- Jeff


Friday, December 21, 2012

Coming Through the Woods

Decks 6 & 7 have been played.  The over-riding theme of these two turns was the Alpian army trying to force its way through the woodline.

Alpia breaks through the woods in South
While Stagonia has checked them in the North, Alpia has forced its way through in the South after some violent clashes resulting in units dissolving and/or routing on both sides.

In a series of volleys, Alpia's Yarp and Stagonia's Hamoncourt shot each other up causing casualties and shaken conditions with Hamoncourt eventually routing; then Yarp doing the same thing shortly after when hit by the Lau Crossbows.

Speaking of Crossbows, the Tellies again distinguished themselves before finally being dispersed by Lau.  Alpia's Xelt Pike & Shot shot up Lau in return, dispersing it and killing Brigadier Eugene Delage, who had joined the Crossbows.

Stagonian North Holds the Line
Meanwhile, in the North, the Stagonian units ordered to proceed South (towards top of photo) had to respond to the units coming through the woods rather than giving them their flanks to hit.

The Forquest Pike & Shot (green banner) shattered the Cianti's Blue Squadron, dispersing it, causing the Lavender Squadron to shake with a casualty.

So at the end of Deck 7 both sides had lost their Crossbow units; Alpia looked likely to lose the rest of the Cianti Cavalry; and each side had a Pike & Shot unit routing (Xelt & Hamoncourt -- neither likely to rally).

Alpia's Knight continue to wait for orders
Far behind the lines, Alpia's Knights, the Lanzia Spezatta, continue to wait for orders.

Couriers were dispatched in Decks 5, 6 and 7 . . . but each time they rolled doubles (on 3d8) and so failed to arrive.

Will they get into the fight?  Perhaps, perhaps not . . . time will tell.

So while things look good for Stagonia around the North Bridge, they have little to stop Alpia in the South.  Two Squadrons of Pincemail Cavalry (not visible in photos) guard the far southern flank along with the Light Artillery piece in the center, plus Brigadier Bizot, who has joined the Jillette Chevalier (knights) look to be all that can currently stem the southern tide . . . although there are some more troops (most notably La Capelle -- black banner) moving in a southerly direction.

Here is a summary of the current situation:

ALPIA

General Geovanni Rossi:
  • Lanzia Spezatta -- awaiting orders (Fresh)
Brigadier Paulo Lombardi:
  • Asti Spumonte Cavalry -- Yellow Squadron 1 casualty; Orange (fresh)
  • Cianti Cavalry --  Blue Squadron gone; Lavender shaken, 1 casualty
Brigadier Luigi Franscioni:
  • Utti Pike & Shot == open order, fresh
  • Izzo Pike & Shot ==open order, 1 casualty
  • Zuff Pike & Shot ==line, 2 casualties
  • Qeel Pike & Shot ==open order, fresh
  • Picanti Swordsmen --open order, fresh
Brigadier Sebastiano Olivi:
  • Xelt Pike & Shot == open order, fresh
  • Yarp Pike & Shot ==routing, 1 casualty
  • Telli Crossbows --gone
Artillery Batteries:
  • Capt. Corelli's Battery -- in North, fresh
  • Capt. Ariete's Battery -- in South, fresh

STAGONIA

General Maxime Murdeau

Brigadier Louis Petit:
  • La Capelle Pike & Shot -- in West, moving south to center, fresh
  • Goyette Pike & Shot -- on road, fresh
  • Forquest Pike & Shot --on road, 1 casualry
Brigadier Marcel Bizot -- joined to Jillette:
  • Jillette Knights -- guarding center, fresh
  • Pincemail Cavalry -- in far South; brown fresh; red 1 casualty
Brigadier Eugene Delage (dead):
  • Hamoncourt Pike & Shot -- routing toward Bellevue Hills, 2 casualties
  • Ardant Pike & Shot -- gone
  • Lau Crossbows --  gone
Artillery Batteries:
  • Blue Artillery -- in South, fresh
  • Artillery Guards -- with Blue Battery, fresh
  • Red Artillery --in North, fresh
I'm not sure that my generals will have much to change, but I will see what they say before I turn another deck or two.

-- Jeff


Sunday, December 16, 2012

Decks 4 & 5 Photos

(I played out these two decks a couple of days ago . . . but I've been pretty drained from the chemo and don't remember a lot of it . . . so this report will mainly be photos to let the players assess the situaltion.)

Knight Regiment Lanzia Spezatta
As you can see at left, I've added pennants to the lances of the Knights. 

Here you can see the red and green squadrons of Alpia's Lanzia Spezatta Regiment.

I wanted the Knights, who move slower but hit harder to be easier to identify so that they won't be confused with ordinary Cavalry.

Knight Regiment Jillette Chevalier
The blue and purple squadrons of Stagonia's Jillette Chevalier Regiment also received their pennants.

Here you see them (and some artillery) guarding the North Bridge.

South Bridge Situation
Other than a lot of movement into positions by both sides there was little "action" other than just over the South Bridge.

Alpia's Telli Crossbows continued to be the "stars" of the early fight.  First they delivered the final blow to Stagonia's Ardant Regiment, shattering it so that it is no longer a factor in this fight.

Then, with only half of their elements firing, they scored 6,6,5 and thus caused a casualty to Stagonia's Hamoncourt Regiment (red banner with white stag), causing it to shake.  But they were, in turn savaged by Stagonia's Lau Crossbows who had marched across the meadow and turned to deliver a casualty marker and shake the Tellies . . . who soon managed to rally.

South Bridge looking North
Currently the two crossbow units are facing off (with Stagonian cav coming up.  Telli is in Open Order but has a Casualty Marker; and the Lau are fresh.

The two pike & shot regiments, Stagonia's Hamoncourt (red banner, casualty marker and shaken) and Alpia's Yarp (orange banner, fresh) are facing off . . . as Stagonia's Brigadier Delage keeps both of his units "in command" as some artillery is moving up as well as the cavalry.

Following are a pair of photos from slightly different directions showing more of the situation around the North Bridge:


Below is an overview of the treeline from the South South West:


And, finally, a pair of images showing some of the positions of the behind-the-lines maneuvering units for the Alpians and Stagonians:

Alpian Rear

Stagonian Rear (south only)


So now all I need is for my Generals to find some time during this Holiday Season and let me know what they want to do.

And I sincerely hope that all of you are able to enjoy your Holidays as much as I'm enjoying these Alpian Wars battles.

-- Jeff

Friday, December 14, 2012

Decks 1-3 Go Alpian's Way

Now that there's been some "contact" between the marching columns, I've switched over to using the "Victory Without Quarter" card deck . . . and while most of the first three decks (two of which were short ones) were devoted to maneuver, they definitely favored the Alpian forces.

Telli Crossbows Shoot Ardent & Shake Them
The first (and so far only) shots of the battle were fired by Alpia's Telli Crossbows (in open order) against Stagonia's already weakened Ardant Pike & Shot (yellow banner).

They got five hits (one more would have eliminated Ardant) causing a second casualty marker (it still had one from the Battle of the Crossroads).

And unfortunately this has caused Ardant to go shaken (they rolled a 4 on their morale check).

South Bridge Looking North
As you can see at left, the next few decks will be critical since units in March Column cannot charge they need their cards or their Brigadier's card to show up so they can change formations (which will also allow them to shoot). 

By the way, there is no "reload marker -- the powder barrel) next to the Telli Crossbows because the reload card turned up two cards later.

Stagonian Southern Column
The small orange die on the Ardant Regiment indicates it is "shaken" (you shake dice, right?).

Fortunately one of Stagonia's replacement units, theHamoncourt Regiment (red banner) is well positioned to expand if its and/or Brigadier Delage card turns up.

The next unit in line is that of the Lau Crossbows who performed well at the Crossroads until the overly-cautious Brigadier Arnoux pulled them out of the center of the village.

More Stagonian enter from the North
 More Stagonian units including both mounted and artillery continue to enter from the north.

The purple and blue knights (nearer the bridge) are the Jillette Chevalier Regiment, under the command of Brigadier Marcel Bizot, as are the Pincemail Cavalry just west of them (whose Red Squadron still carries a casualty marker from the Crossroads.

Right behind them is General Maxime Murdeau and his artillery train . . . and there is more dust behind them.  On the far side of the treeline can be seen the beginnings of more Alpians.

The Alpian Forces Entering the Action
Examining the photo to the left gives a long-range view of the two Alpian columns.

Are there more troops yet to come?

Stagonia is too far away and the forest is blocking the view in any event.

(And I just noticed that some trees have fallen down . . . I will have to fix that.

So now it is time for Generals Rossi and Murdeau to update any orders they wish to change now that they've seen what has happened.

-- Jeff

Thursday, December 13, 2012

After Some Marches

For the pre-battle march sequences I do not use the "Victory Without Quarter" action deck.  Instead I presume that all units in each column will follow at their instructed speed unless ordered differently.

Columns About to Collide . . . Maybe?
As you can see, the Alpian Crossbows (moving 12+1d3" on the road) and the Stagonian Pike & Shot (moving 8+1d3" on road) are both approaching the Southern bridge.

So I will be asking my online generals what they will be ordering their troops to do.

Yes, it is very early in the game . . . and nothing else seems to be in any sort of imminent contact . . . although the cavalry leading the Alpians on the north road are not all that far from the north bridge if they move with speed.

Southern Bridge looking North
Here is another view of the situation, looking North.

Perspectives can be a bit funny.  It does appear that the Crossbows have a better chance of reaching the crossroads first

But their following Pike & Shot unit and that of the Stagonians are at fairly similar distances.

What will these generals do?

Alpian Columns Marching West
At left you can see at left, the pair of Alpian columns are moving west.

The northern (left) column seems to have a lot of banners and units which the Stagonians recognize . . . but that southern column (on the right) does not have any recognizable units yet.

What does this mean?

Probably reinforcements, eh?

Stagonians Marching South and looking East
But wait . . . isn't that a unit of knights just coming into view?

Indeed it appears that perhaps Stagonia has some reinforcements also.

(One of the joys of a campaign with somewhat limited units is that "history" grows with each battle . . . and rivalries grow . . . and the Generals become more attached to certain units . . . and indeed I've already seen that beginning to happen.) 

-- Jeff


Wednesday, December 12, 2012

Delage's Choice

The "Battle for Bellvue Hills", the second phase of "The Alpian Wars Mini-Campaign" is now underway.

Brigadier Delage Must Make a Choice
The Stagonian forces have entered from the North (view is from SSE) and must choose which way to proceed.

If they turn West over the bridge, they are likely to run into an Alpian force since dust is visible in that direction.

If they go straight ahead on the road along the deciduous trees, they might be in time to delay the Alpian column arriving on the South road.

Alpian Columns from the West
If they choose, they can leave the road and head for the South Pass of the Bellevue Hills to mount a defense there.

Or, of course, they can turn left and head up the road to defend the North Pass of the Bellevue Hills.

So it is really up to General Murdeau rather than Brigadier Delage who must make the choice.  Now it is time to really ISSUE ORDERS to his Brigadiers.

Bellevue Hills from the West
Okay, General Rossi also has to make some choices too.  Presumably he will stay on the roads . . . but perhaps not.  And at what speed will he have his troops move.

All troops in "road column" (i.e.,  both starting and ending on road) gain an additional 1d3" of movement.

While this can result in some gaps in the column, it does on average add a couple of inches of movement as opposed to offroad column movement.

Here are the standard movement rates  for all troop types when in "open terrain" . . . and all terrain on the table is "open" except for the obvious woods and the slopes of the Bellevue Hills, which are steep.
  • Pike & Shot -- 4" in Line; 8" in column; (+1d3" on road)
  • Other Foot -- 6" in Line; 12" in column; (+1d3" on road)
  • Light Artillery -- 6" when limbered; (8"+1d3" on road)
  • Knights -- 6" in Line; 12" in column; (+1d3" on road)
  • Cavalry -- 8" in Line; 16" in column; (+1d3" on road)
  • Officers -- 12" (and issue orders); (+1d3" on road)
Oh yes, the Alpian columns were delayed 1d3 moves each (per the scenario) but are now free to move as they wish.  Brigadier Olivi is at the head of his column on the South road, followed by some Crossbowmen and an unrecognized Pike & Shot regiment.  On the North road, Brigadier Lombardi is leading something not yet visible to Delage's scouts.

So once the Generals have issued their Orders to their various Brigadiers, I will likely be able to process a number of moves.

-- Jeff

Sunday, December 9, 2012

Some Notes on "Casualties"

In Clarence Harrison's "Victory Without Quarter" ECW rules (and in many other rule sets) a "casualty" does not mean lots of dead soldiers, but rather a reduction in their combat effectiveness.

A unit removed for too many "casualties" is not "wiped out", it is merely no longer an effective force on that given day.  What would happen after the battle is that many soldiers would return to their camp and the unit would be built back up from that cadre.

For an on-going campaign such as "The Alpian Wars" I am using the following simple formula for determining how many men return to their unit:
  • 1st casualty  --  returns on a d6 roll of 2 or better
  • 2nd casualty  --  returns on a d6 roll of 4 or better
  • 3rd casualty  --  returns on a d6 roll of 5 or better
So most of the units that were "dispersed" and removed from the table top during the Battle of the Crossroads have now regained some (or all) of their casualties.   However some are carrying casualty markers forward into the upcoming Battle for the Bellevue Hills.

Some three  weeks after the Battle of the Crossroads (and a certain amount of command changes and reinforcements) word has reached Stagonia that a large Alpian force under General Rossi will attempt to force its way through the passes of the Bellevue Hills into the rich wine valleys of Stagonia . . . and General Murdeau has been given a force to try to slow Rossi down, beat him to the Bellevue Hills and prevent the Alpians from breaking through.

Soon we will find out what will happen.

-- Jeff

Tuesday, December 4, 2012

Looks Like an Alpian Win

While it started out good for Stagonia when the Alpian Cianti Cavalry charged the Cheveaux de Rappeneau but were beaten and pushed back with a casualty marker . . . but Cianti and Brigadier Lombardi both saved so the regiment wasn't Shaken.

But then the Artillery shattered Stagonia's Falcon Regiment with a three-hit shot that dispersed the Regiment.

The Cavalry Action
Brigadier Gilbert advanced the Cheveaux de Pincemail and then charged up the hill at the Asti Spumanti regiment, catching them at a halt . . . which should have been good but the Stagonian dice were poor and the Alpian dice splendid (only 2 hits to 4 even with Alpia suffering the -2 for being at the halt).

The result was the destruction of the lead Squadron and the second being pushed back . . . but it did not shake.

Perhaps seeing their fellow cavalrymen disheartened the Cheveaux de Rappeneau, for while they definitely had the advantage, the Cianti outfought their lead Squadron, dispersing it and pushed the second back as well.

So with half its cavalry gone and only their Goyette Pike & Shot unit left, General Murdeau will likely have to break off and save what he can . . . (I will allow the two Squadrons and Goyette to escape unscathed if he so chooses.

A look at the North shows that there seems little point in pursuing the fight.  Izzo holds the Village and soon the Light Gun will seek out the slow-moving Pike & Shot regiment . . . and, in the South, the Stagonian cavalry is outnumbered two to one.

-- Jeff


Monday, December 3, 2012

Five Decks Played

I've played Decks 13-17 and (except for Falcon's abysmal shooting) they seemed to favor Stagonia this time.

Deck 13 started with "Turn Over".  Deck 14 had one cav card, then "Turn Over" . . . so two very quick turns in.

Then Deck 15 opened with the Stagonian C-in-C, General Murdeau, who repositioned some units, ordered some ineffective shooting and moved into the woods to the south toward the cavalry.  He sent a courier with orders for Brigadier Gilbert . . . but the poor fellow hit his head on a tree limb, was unhorsed and failed in his attempt.  A few cards later and the "Turn Over" card appeared again.

Deck 16 saw Izzo retire into the village . . . and then "Turn Over" again.  Through four Decks only eight non-Turn Over cards appeared  . . . and most of those had little effect.

View from North
Deck 17 was different.  It started with the "Reload" card, then the Artillery card . . . which resulted in Falcon going Shaken.

Next was an "Event" card, with the next brigadier being able to give two orders to each of his units within 6".  This turned out to be Stagonia's Brigadier Delage.

First he ordered de la Forquest to wheel and fire on Qeel, which caused one casualty marker (5 hits) and Qeel going Shaken.  Then he had de la Forquest move into charge range (although their subsequent volley was ineffective)..

Delage then managed to rally Falcon back to steady (but they still couldn't seem to hit Utti with their shooting).

View from South
Alpia's Utti regiment was able to cause a casualty to the 1st squadron of the Cheveaux de Pincemail, who failed their morale roll and shook.  But then General Murdeau's card came up again.  He was able to change the orders of Cheveaux de Rappeneau and advance them into charge reach; and instructed Brigadier Gilbert to join the Pincemail cavalry which just managed to rally them.

At the end of the turn, de la Forquest charged Qeel . . . and, while failing to give them another casualty marker, did beat them which resulted in Qeel failing another morale check and routing off the field.

So both sides are now on the brink of losing over 50% of their forces . . . and the action moves to the South.

== Jeff


Short & Eventful Deck 12

Deck 12 opened quietly enough with both Stagonia's Goyette Regiment and Alpia's Regiment Utti missing their shots.

But then General Rossi's card appeared.  Qeel opened with four hits on Goyette causing a third casualty marker which dispersed them.

Izzo (purple banner) rolled three sixes against Falcon  (brown banner) resulting in a casualty marker and blown test which left them Shaken.  The Light Gun then hit them, causing them to rout.

But then Brigadier Delage's card came up for Stagonia. 

He ordered Regiment de la Forquest to advance onto the Hill where they delivered a volley that dispersed Alpia' Zuff Regiment.  Then he joined the routing Falcons and rallied them.

While the cavalry to the South remained just out of charge reach of each other, Alpia's courier isn't far from reaching Brigadier Lombardi.

Indeed, General Rossi himself has moved closer to the cavalry as well.  And although Regiment Utti missed its shot at Stagonia's cavalry, it is in position to do some damage once it gets itself in order.

So while this Deck involved very few cards, it did see the demise of a regiment on each side and perhaps bodes for some action soon in the south . . . depending upon what orders I receive and the luck of the cards and dice.

-- Jeff

Sunday, December 2, 2012

Deck 11 -- Situation Fragile

Again Alpia managed to gain on the 11th Deck . . . but is in perilous straights with two units one casualty marker from oblivion.

View from North
The deck started well for Alpia.  Qeel (brown banner, bottom of photo) managed to clobber Stagonia's Goyette Regiment (blue banner) with five hits causing a casualty marker . . . and Goyette then failed its test and was Shaken as well. 

(Note that later in the turn Brigadier Delage joined Goyette and managed to rally them back to Steady).

Then Utti (yellow banner) finished off Stagonia's Lau Crossbows . . . and Brigadier Arnoux fell mortally wounded as well (he failed his save).

Meanwhile General Murdeau advanced his lines against the Alpians. 

Of particular note has been the behavior of the Falcon Regiment (brown banner).  They have over this and the last few decks made several saves after being hit by Alpia's Artillery (between buildings).  Furthermore they shot up the Izzo Regiment (purple banner) so that it (as well as Zuff) are perilously close to breaking.

And while little has changed in the south where the two cavalry brigades are still staring at each other, General Rossi has dispatched a courier (visible at the south end of the middle building, behind Utti.

Of course couriers often fail to arrive safely and this one will probably need two more turns to arrive at Brigadier Lombardi's position with the Cianti Cavalry Regiment.

-- Jeff

Saturday, December 1, 2012

Alpia Advances -- Decks 9 & 10

Deck 9 was huge for Alpia.  Only 7 cards long it included Alpia's General and two Brigadiers.  The lone Stagonian card was a cavalry regiment . . . and they remain immobile.

During this deck, Regiment Utti finished off Stagonia's Ardant Regiment and Zuff took out the Stagonian Field Gun.  But in Deck 10, Stagonia's Regiment Goyette dispersed the Picanti Swordsmen before they could be pulled out of danger.

View from North
As  you can see to the left, a gap has opened up between the two forces.

(Note:  Alpia's "yellow" Brigadier Buffo is actually farther up the hill in a one o'clock direction . . . he slid down before I snapped this photo).

Stagonia's Brigadier Delage (on far left) has managed to Rally the routing de la Forquest Regiment (green banner), which now has a pair of Casualty Markers.

View from South
A view from the other direction shows the gap between lines a bit better.

Once again I have omitted showing the two cavalry brigades to the south of this image since they seem to do nothing but stare at each other.

It should be noted that all three clearly visible Alpian Pike & Shot units need reloads, while Qeel (out of sight in the far north) and all of the Stagonian foot are fully loaded.

Several Brigadiers are currently attached to units . . . and perhaps the General's might wish to change this (or attach others).  Following is a rundown of all units situation:

ALPIA:

General Rossi -- unattached
  • Brigadier Lombardi  --  attached to Cianti
  1. Asti Spumonte Cavalry  --  steady, out of command
  2. Cianti Cavalry  --  steady (brigadier attached)
  • Brigadier Franscioni  --  attached to Zuff
  1. Izzo  --  steady, one casualty, needs powder, out of command
  2. Zuff  --  steady, two casualties, needs powder (brigadier attached)
  • Brigadier Buffo  --  unattached, out-of-range of Utti
  1. Picanti Swordsmen  --  two casualties, dispersed and out of battle
  2. Utti  --  steady, needs powder, out of command
  3. Qeel  --  steady
  • Light Artillery  --  unlimbered

STAGONIA:

General Murdeau  --  unattached
  • Brigadier Arnoux  --  attached to Lau Crossbows
  1. Ardant  --  three casualties, dispersed, out of battle
  2. Lau  --  steady, one casualty (brigadier attached)
  • Brigadier Gilbert  --  unattached
  1. Cheveaux de Rappeneau  --  steady
  2. Cheveaux de Pincemail  --  steady
  • Brigadier Delage  --  attached to de la Forquest
  1. de la Forquest  --  steady, two casualties  (brigadier attached) 
  2. Goyette  --  steady, inspired (+1 to die), out of command
  3. Falcon  --  steady, out of command
  • Foot Artillery & Guard  --  overrun and dispersed, out of battle
 So there you have a run-down of the current situation . . . time for Rossi and Murdeau to decide what they want to do next.

-- Jeff


Decks 6, 7 and 8

Three decks worth of moves?  YES!

Well the first deck was two cards long . . . the Alpian C-in-C and "Turn Over"; and the next deck was only six cards long . . . but Deck 8 ran all the way through with "Turn Over" being the bottom card in the deck!

View from North
Looking from the north, it might not look like a lot has happened . . . but there has been lots of shooting and Regiment Zuff (green banner atop hill) now has two casualty markers . . . although fortunately the attached Brigadier Franscioni saved both times).

Yes, that means that Stagonia finally got its Field Gun in operation.  Alpia's Swordsmen ran the Stagonian Artillery Guard off but have taken a casualty from Regiment Goyette (blue banner).
View from South

Alpia's Izzo Regiment (purple banner) has come out of the northernmost set of buildings and has traded casualty markers with Regiment de la Forquest (green banner with white stag).

Regiment Utti (middle building) may look like it too has advanced, but it is currently occupying that set of buildings.

To the east you can see the still shaken remnants of Stagonia's Ardent Regiment . . . and just east of it Brigadier Arnoux has finally managed to rally the routing Lau Crossbows.

View from West
Looking west you can see another perspective of the current situation after eight decks.

There are no photos of the two cavalry brigades facing each other because that situation remains static . . . both sides just out of charge reach and awaiting any orders to move up and charge.

While Alpia currently holds two of the three objectives (southern hill and village) and is contesting the northern hill, the sides are really rather similar in their status in regard to casualties . . . and things could easily change quickly.

Alpia:
  • Zuff -- 2 casualies
  • Izzo -- 1 casualty
  • Picanti Swords -- 1 casualty
Stagonia:
  • Ardent -- 2 casualties & Shaken
  • de la Forquest -- 1 casualty
  • Lau Crossbows -- 1 casualty 
So now it is time for David and Ross to send me any new orders . . . and for you to wait for another update.

-- Jeff

Thursday, November 29, 2012

More Bad Powder

Well Deck 5 was a rather short turn and not particularly eventful.  The "Turn Over" card came up about a third of the way into the deck.  The outstanding characteristic of the deck was poor shooting (or bad powder) on both sides.

View from North
As can be seen at left, many "powder barrels" are present (indicating they fired) and most of them at close range . . . but only Alpia's Utti Regiment (yellow banner, upper right) was able to cause a casualty marker on Stagonia's Crossbows (in the cover of the middle building).

The crossbows had previously saved against the one hit by Alpia's Light Gun but failed their throw against Utti and so are now Shaken as well as down a Casualty marker.

The Hill at Deck 5's End
Meanwhile, on the Hill, a number of units were able to deploy into line and shoot . . . but no one caused any damage.

Stagonia finally managed to get their Field Gun unlimbered so that it can shoot the next time the Artillery Card comes up . . . if it is still there and not shot to pieces or overrun.

Meanwhile in the south, both cavalry brigades wait just out of charge reach.  Until one (or both) Generals sends orders, it looks like this situation will remain static.

The routing Stagonian Ardent Regiment appears to be far enough from Alpian unit to attempt to rally when its card next comes up . . . but down two Casualty Markers it is questionable as to how effective it might be.

Hopefully my players will email any orders soon and we will have the Deck 6 results.

-- Jeff

Monday, November 26, 2012

Big Alpian Push

Well our fourth deck was decidedly in favor of Alpia.  Key cards for Stagonia were left in the last four in the deck when the "Turn Over" card appeared.  Failing to appear were the "Artillery" card and those of his Crossbows, Regiment de la Forquest (green banner) and his forward Brigadier (Arnoux).

View from North
Meanwhile, Alpia's Zuff Regiment was able to move not only on its card, but on those of General Rossi and Brigadier Franscioni (who is attached) . . . and were able to reach the south end of the hill.

In addition, Regiment Izzo charged the shaken Stagonian Ardents and routed them from the Village . . . giving them a second "casualty marker" as well.

View from West
As can be seen in the image to the left, Alpia has also managed to begin to position its reserves.

(Note:  the crossbows outside the center building and the figures outside the northern building are actually "inside" those buildings . . . so while it may seem like the crossbows are in range of Utti regiment, they are actually beyond long range.)

The Hill
It currently looks a bit doubtful that Stagonia will be able to get its Field Gun unlimbered and firing before Zuff arrives . . . but events might change that.

Certainly one piece of good news is that the Colonel of Regiment Goyette (blue banner) made a speech which has inspired his regiment to do all it can for the Stagonian cause . . . (an Event Card gives them a +1 on their dice rolls for the rest of this battle).


Cavalry Standoff in the South
 At the south end of the village, the two cavalry brigades each remained stationary.

Are they in charge reach?  There is doubt on both sides.  It is close . . . but not a sure thing.

So, for now, they both seem content to hold their positions and await instructions.  It did seem that General Murdeau had dispatched a courier . . . but his horse stumbled and no more was seen of the rider  . . . (couriers move 3d6" but if a doubles are rolled, they don't make it . . . he rolled 1,5,5 and so died).

What will happen on the next set of moves and card turns?  We shall have to wait and see.


-- Jeff


Saturday, November 24, 2012

Izzo Has Bad Powder

View from West
Il Duca Michele di Alpia may want to look into who supplied the gunpowder for his veteran Izzo Regiment.  Suspicions have already been raised that some vile Stagonian supporter has sabotaged their powder supply.

(Needing a 4+ to hit, Izzo rolled 1,2,2,2,2,3; then later needing a 5 to hit, they rolled 1,2,2,2,3,3 . . . which is highly irregular to say the least).

Alpia's Izzo Regiment discovers bad powder
  As Deck 3 opened, Regiment Izzo performed a wheel and advance and fired into the Stagonian Ardent Regiment hovering in the northern part of the village.

True, the Ardents were in cover, but still Izzo should have had some hits . . . and later when they delivered another volley, again their shots were seemingly irrelevant.

Northern View
As can be seen in a wider view, Alpia's General Rossi was able to manage to maneuver his troops into better position.

He must be particularly pleased with his Light Artillery, which managed to unlimber and pound the Ardent Regiment . . . causing a "casualry marker" (with a 4,4,4 shot) as well as forcing a "morale test" which Ardent failed, causing it to go "Shaken".

Indeed that action almost caused Stagonia's Brigadier Arnoux to pull his forces out of the village (he came within one pip of doing so).  Perhaps it was only the impending arrival of Stagonia's Field Gun on the hill that held him in his position.

Southern View . . . Cavalry Face Off
Meanwhile on the southern end of the village two cavalry brigades seem poised to charge each other.

The winner here could determine the course of the battle.  If one side or the other sweeps the other away, they will be free to exploit the other's rear.

Definitely an area to watch.

On a personal note, I would very much like to thank Ross Macfarlane and David Murdock for their participation in this project.  Given my health issues it has been over six months since I've done any gaming . . . and this allows me to do it at my own pace and take breaks when I need to.  It is incredibly good medicine for my soul at least . . . and probably for my body as well since it lifts my spirits.

-- Jeff